How to make an AFRORETRO styled Lavender Bag


This is a little later than promised but it’s been a hectic weekend!
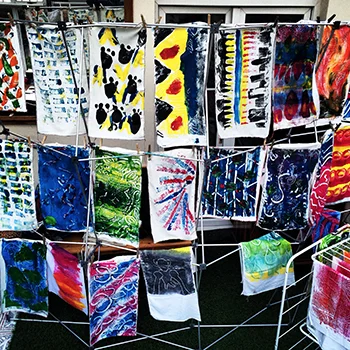
So you may have seen my star lavender bag on Facebook, Twitter AND Instagram…yeah I was pretty proud of my blanket stitch!! So now I am going to share the magic…
I’ve added a lot of tips and alternatives so if you wanna just get making scroll down to the steps in large bold font.
Things you’ll need:
- Clean Fabric (any scraps will do)
- Iron on interfacing - medium weight
- Iron
- Card (any packaging waiting to be recycled)
- Ruler
- Pen/Pencil/tailors chalk
- Scissors for card/fabric/wool (Lilly is particular about her scissors so we have ones for different stuff
- Wool or a thick embroidery type thread (you may want to use a thread colour that contrasts with your fabric)
- Needle
- Lavender buds
- Raffia/ribbon/cord (something to hang your bag from)
- Eyelet & Maker (or you can easily sew a ribbon/cord loop)
Most of these things you’ll probably find in and around your house. Be inventive, if you don’t have any ribbon, cut the annoyingly long ribbons they put inside your vest to help it stay on a hanger…who hangs their vests anyway???
We love to put eyelets in everything, it’s our AFRORETRO thing. You can buy a pack of eyelets with a manual eyelet maker for about £5, but be warned they are addictive!
You probably have lots of fabric around your house without knowing. Those ripped jeans you were going to fix 3 years ago…that stained top that’s ruined but you can’t bear to throw it out. Or if you are super disciplined and recycle and fix everything, pop to the local chazza and pick up any item you like. If you challenge yourself I’m sure you can find something for £1. Don't forget to ask friends and family for unwanted fabric or rummage through the scraps bin at your local fabric shop/market stall. Interfacing makes fabric firm and easy to handle. It’s super cheap and a metre is more than enough for a fair few bags, which should only cost you about a £1.
The lavender you may have to buy if you don’t have your own bush. I got mine from Lavender World, but there are lots of places to buy it on etsy and the like.
So we’re ready to go...
STEP 1:
Decide what shape you want. Draw that shape onto your card and cut it out. This is your template
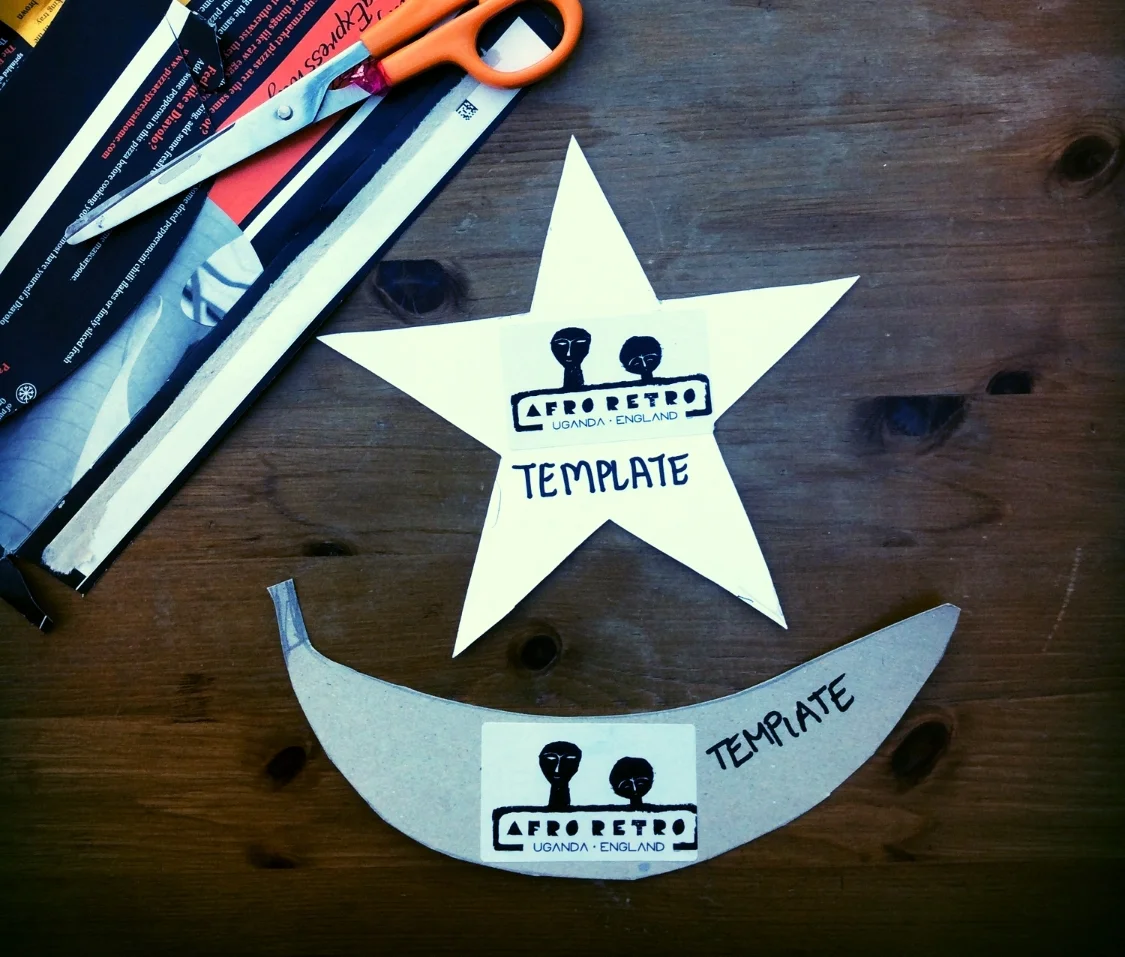
I love a star so that’s what I started with. You can experiment with different shapes, hearts, bananas, diamonds, triangles - literally whatever.
If you’re going to machine sew it though, think of how intricate your shape is and match it to your sewing ability.
Step 2:
Make sure your fabric is clean and ironed if need be. Once you iron the interfacing it cannot be used again, so cut a piece the size you need for your two fabric pieces. Place the shiny side face down onto the wrong side of your fabric and iron. Iron it as hot as the fabric can handle. Make sure you iron both sides to smooth out any wrinkles.
As I used denim, which was quite thick for one side of my bag and Ankara (African Wax Print) for the other, I only interfaced the Ankara as it was quite light weight. This will make it easier to sew but not to worry the smell still comes strongly through. If you’re using light weight fabric you need to interface it. On the interfacing you’ll notice one side is shiny and or a bit rough, this side has glue.
Step 3
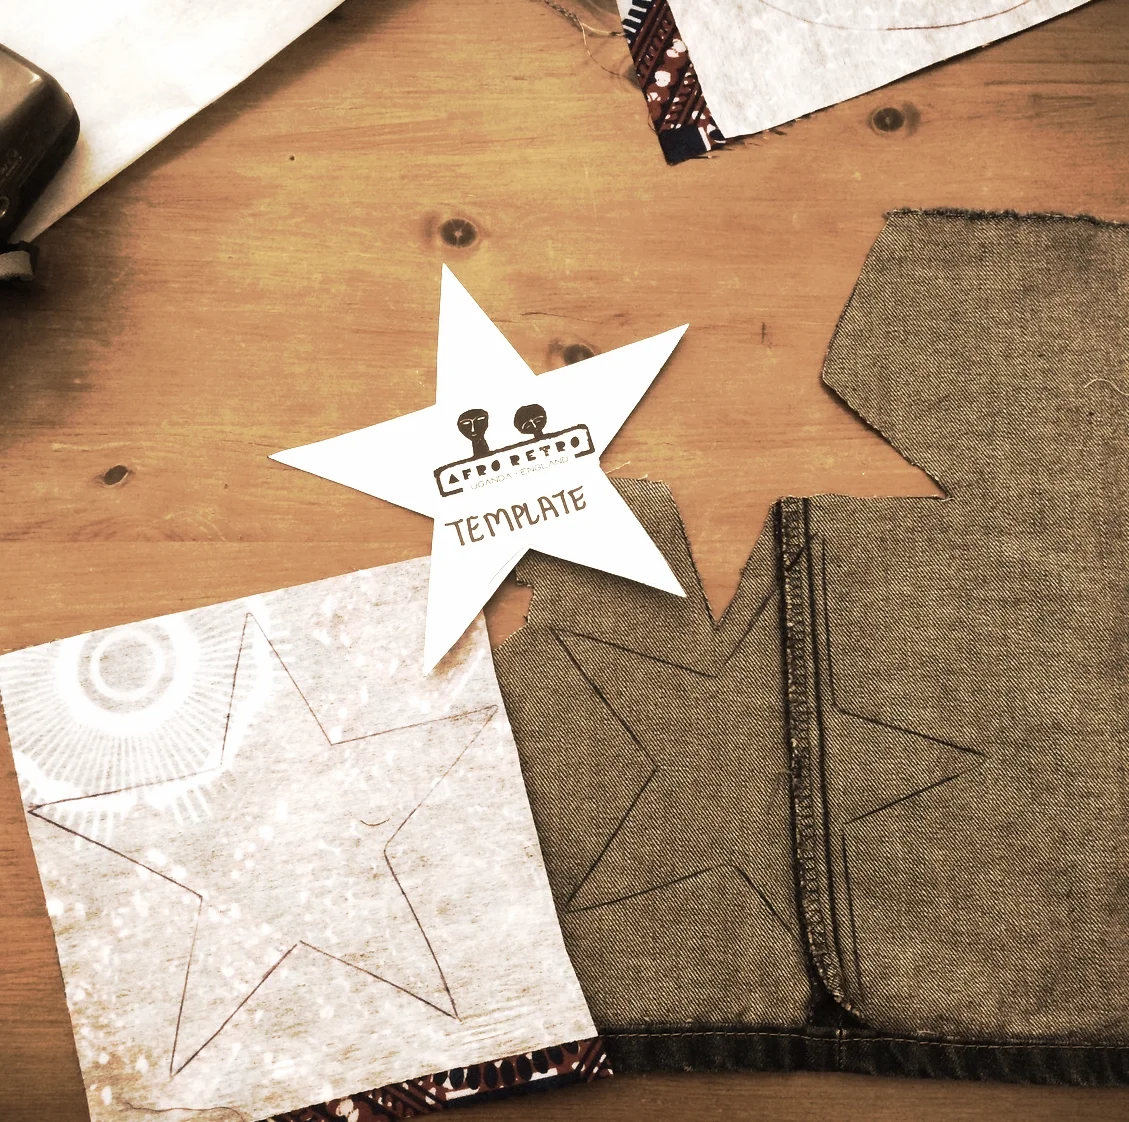
Place your template onto the wrong side of your fabric (the side with interfacing). Draw round it and then cut it out as neatly as you can
Step 4
Now we're going to learn how to do a decorative blanket stitch.
Thread your needle with a long piece of wool/thread without a knot at the end.
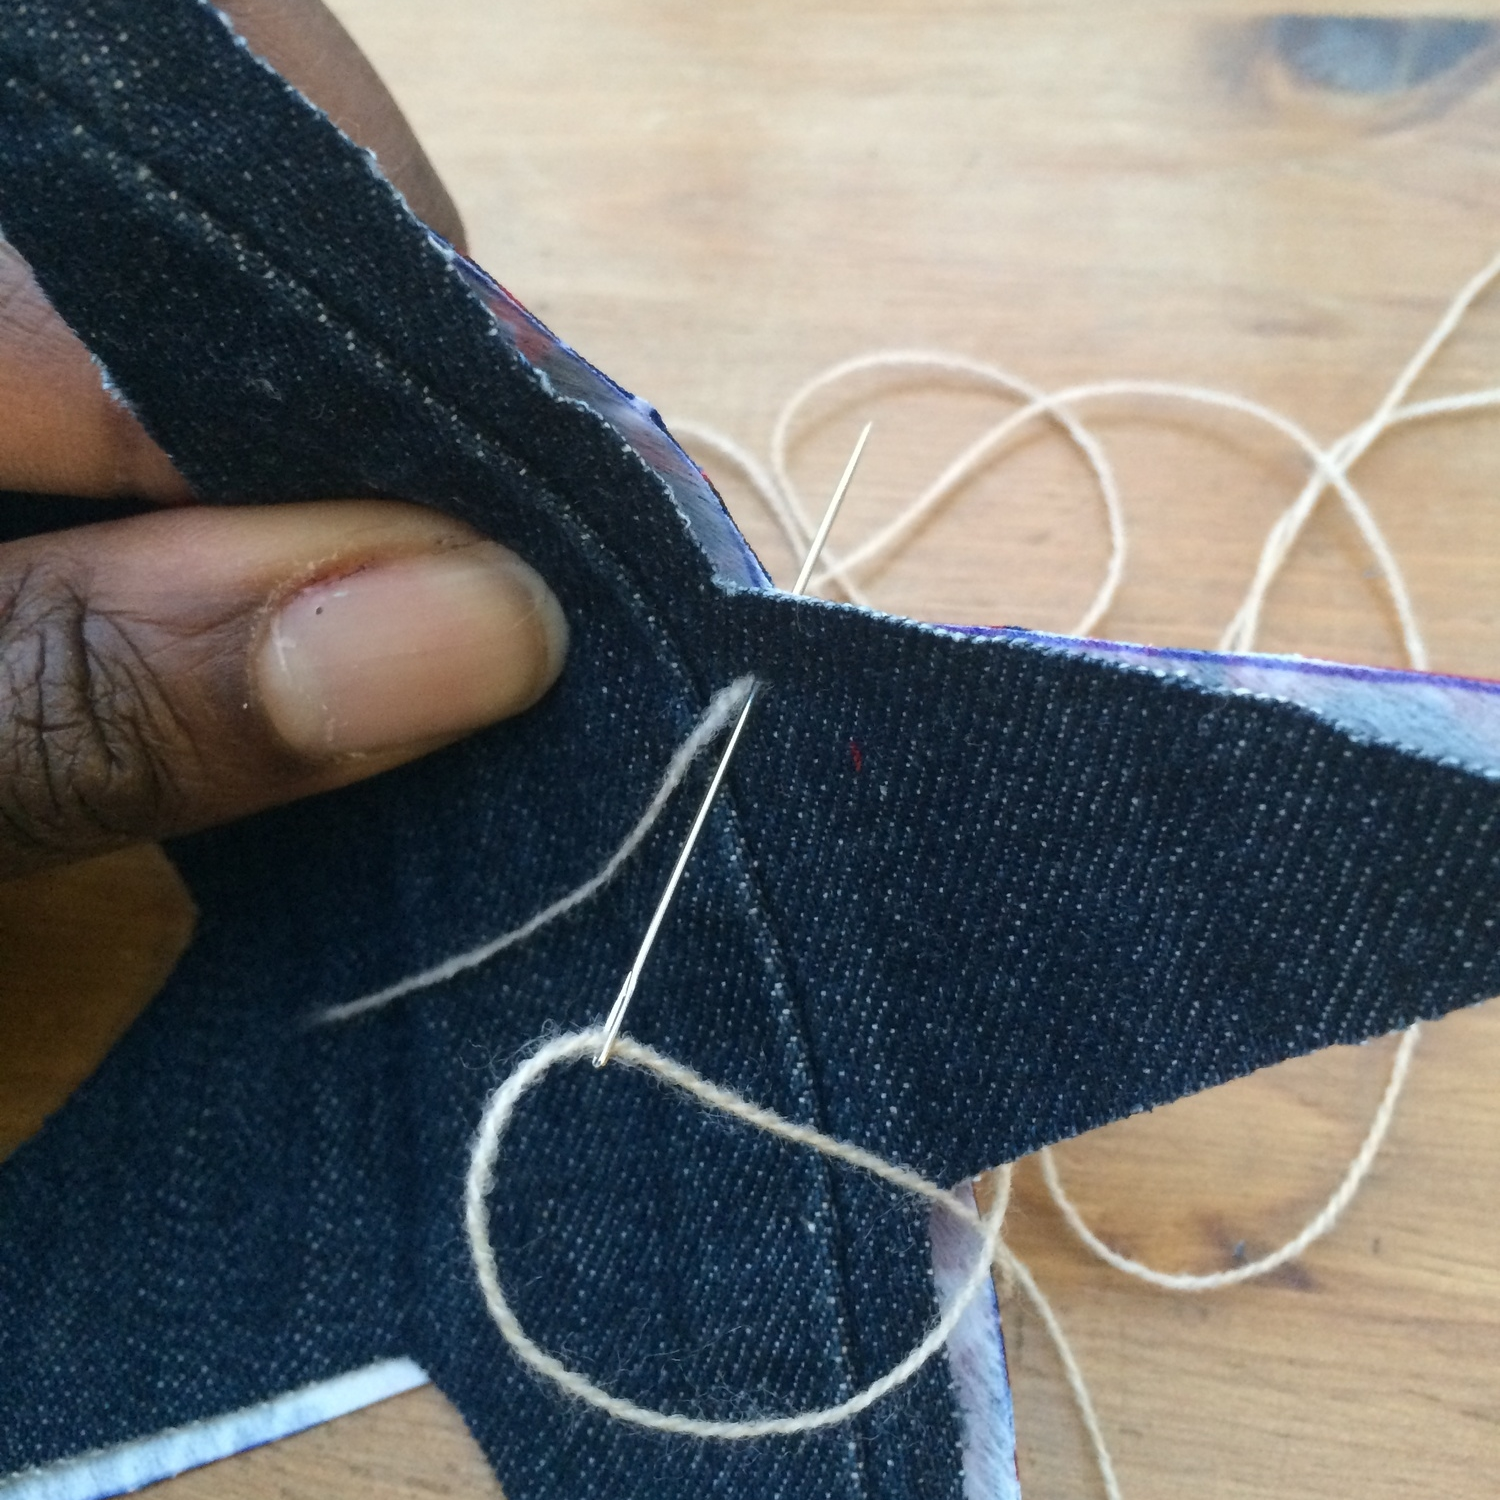
Match up your two pieces wrong sides together. Choose a starting point, it doesn’t really matter where. Poke the needle through from the top layer through to the bottom layer about half a cm from the edge (it is easier if you keep the two pieces the same way up from now on). Pull the thread almost all the way through leaving about 2cm of thread. Poke the needle back through as close to the same hole as possible and then pull the thread all the way through. Do this again about 3 times – this is to secure our start without an ugly knot hanging on the outside. Now poke the needle about half a cm along, from front to back and pull a little. (I find as I am right handed going to the right is easier)
The next bit is really important. Poke the needle through the loop you’ve created, then continue pulling the needle until the thread is tight. You should have your first blanket stitch. Carry on, so poke the needle about half a cm along in the same direction from front to back, pull the thread, poke the needle through the loop you’ve created, then continue pulling the needle until the thread is tight. That’s it keep going until you’re almost all the way round or until you run out of thread
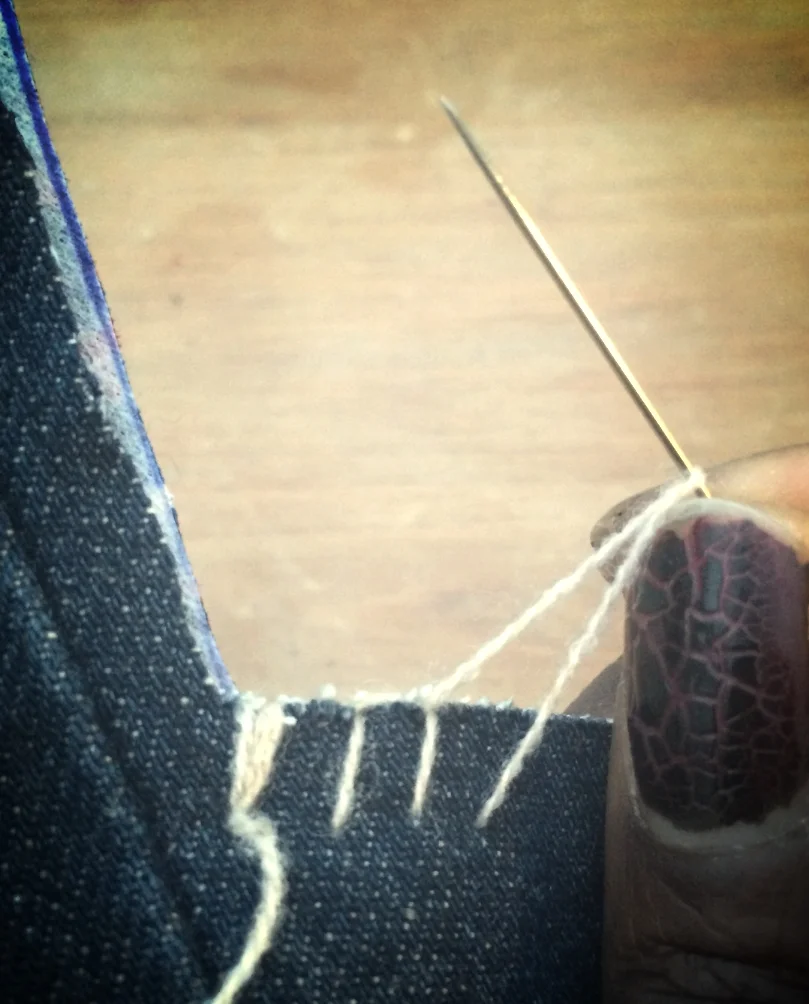
We need to leave a gap to stuff in our lavender.
When you’ve sewn enough and have a gap for lavender stuffing, make sure you have at least 10cm of thread left.
Then repeat the first stitch we did, going over and over the same stitch (without poking through the loop) to make sure it doesn’t unravel. If you need to continue re-thread your needle and keep going, remembering to do the securing stitch at the start and end again. You can leave the dangly threads loose for now, we can tidy at the end.
Step 5:
Stuff in your lavender
However you want to do this go for it. I used a tea spoon and the end of a chop stick to get it into the spokes of the star. Be gentle though as you don’t want to poke through your beautiful blanket stitch. Also don’t over stuff it as you have to continue sewing
Step 6:
Pick up your needle and carry on blanket stitching all the way round.
Step 7 – You’re nearly there!
Now it’s just the hanging thingy we need to make. Of course if you want it for a drawer you can skip this step but it’s nice to have the flexibility after it’s made.
To eyelet:
Find the spot you want it to hang from. Manipulate it so that the lavender buds are on either side of this spot. Make your hole, in whichever way your eyelet maker suggests (hammer, hole puncher, scissors etc). Put your eyelets in place and hammer away…watch your fingers though!!!
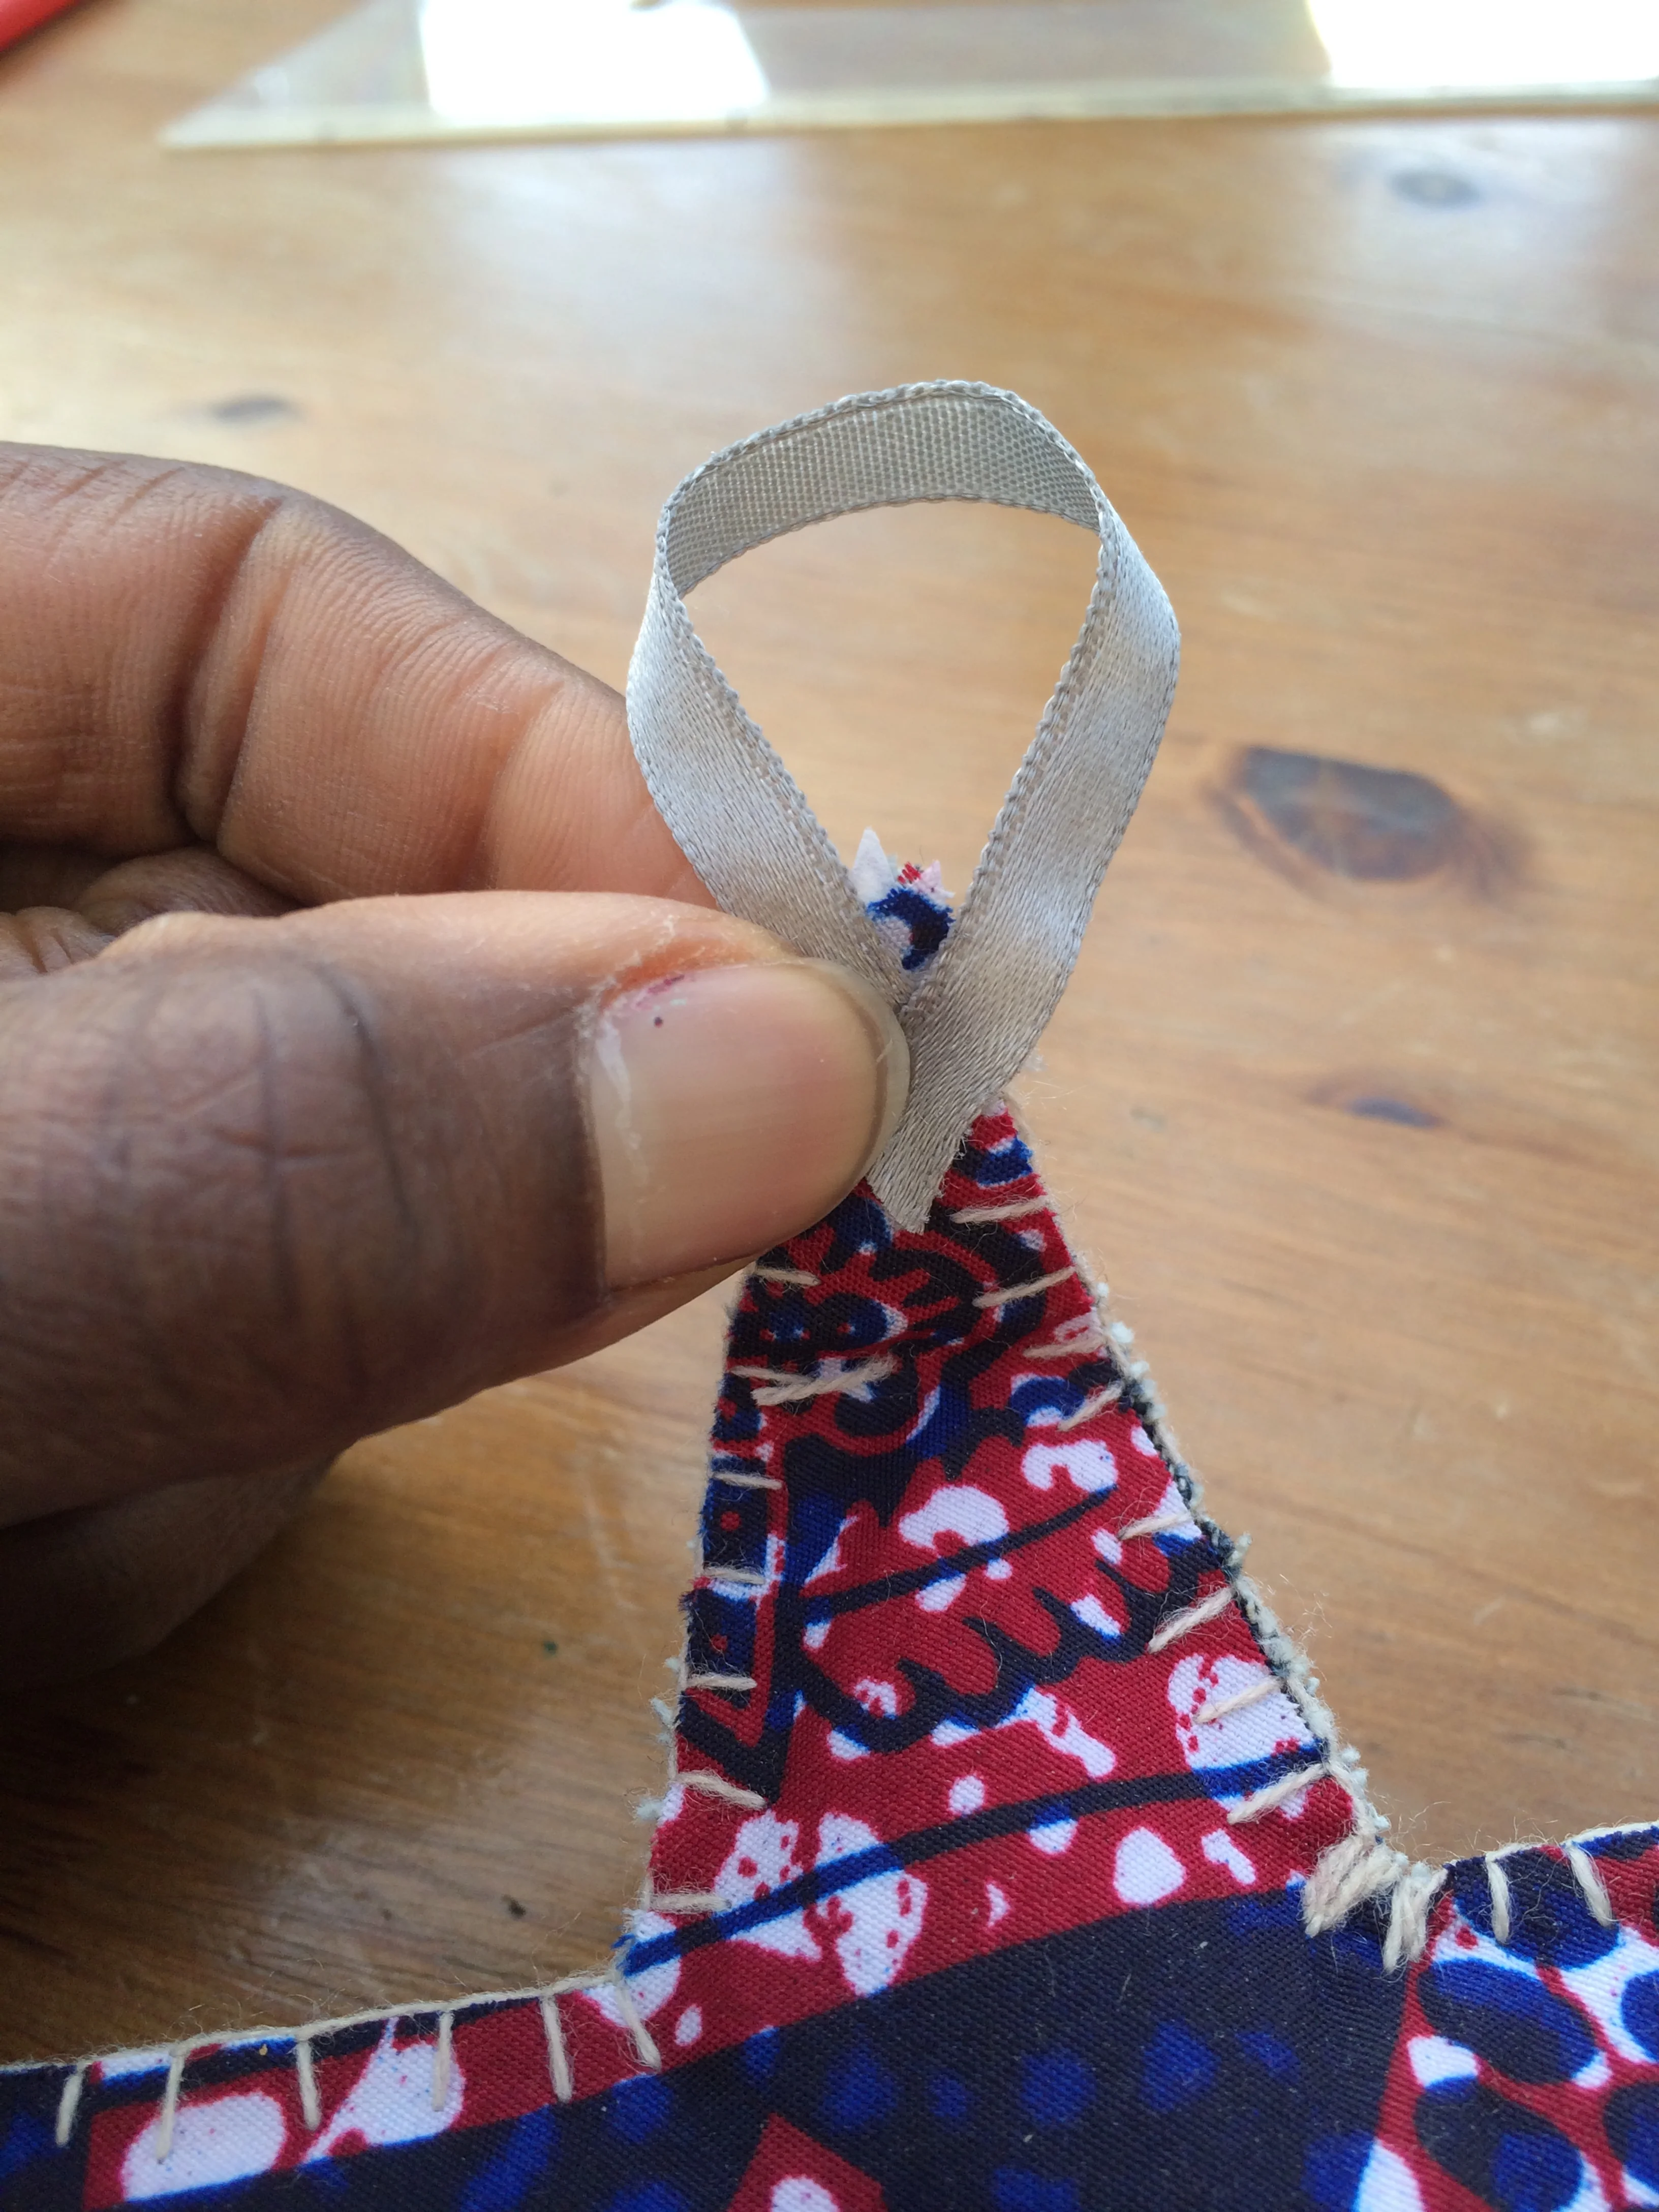
To make a loop:
cut a small piece of thick cord/ribbon approx 10cm long. make sure the ends are neatly cut as they will be seen.
If you’re using ribbon you may want to cut it at an angle (like frankfurters - they look nicer cut at an angle).
Thread your needle and put it somewhere easily retrievable. Choose which end you want to be the top of your lavender bag and the point you want it to hang from. Place one end of the ribbon/cord at this point and hold them together with one finger and thumb. Then pick up the other end and twist so that both ends meet. Hold both ends now with one finger and thumb and with the other hand pick up your needle and thread.
Sew the ribbon/cord onto your lavender bag, using the first secure stitch we used before to start and then put in a few small straight stitches (just in and out) and another secure stitch at the end.
This may only be three stitches altogether depending on how wide your ribbon/cord is. Voila!!
Step 7a
Now you can use your ribbon/raffia/cord to thread through your loop/eyelet and hang wherever you need it.

ANNA ENJOYING HER AFRORETRO LAVENDER BAG
ENJOY and may the Moths be without you!